
Buying a home that needs work—or watching the house you have lived in for years fall out of date—presents an exciting opportunity to shape your living space around your lifestyle. However, taking on a comprehensive renovation often leads to quick, overwhelming realization. Managing overlapping timelines, coordinating trade contractors, selecting materials, and watching expenses mount can paralyze even the most organized homeowners. Without a clear plan, it is easy to make strategic mistakes that waste money and drag out timelines.
The primary reason home projects derail is improper sequencing. Homeowners frequently jump straight to aesthetic updates—such as refreshing a kitchen or updating a guest bath—only to discover later that leaky plumbing, compromised structural members, or sagging subfloors require tearing out that brand-new work. Fixing mistakes after the fact drains budgets and leads to contractor delays.
To achieve a stress-free outcome, you need a disciplined, phased roadmap. This guide outlines a logical, room-by-room sequencing framework designed to protect your structure first, upgrade high-impact functional areas second, refine secondary spaces third, and finish with your outdoor environment. Paired with strict financial management strategies, this roadmap will help you navigate your project with clarity and confidence.
Phase 0: Triage & Infrastructure (Prioritizing the Unseen)
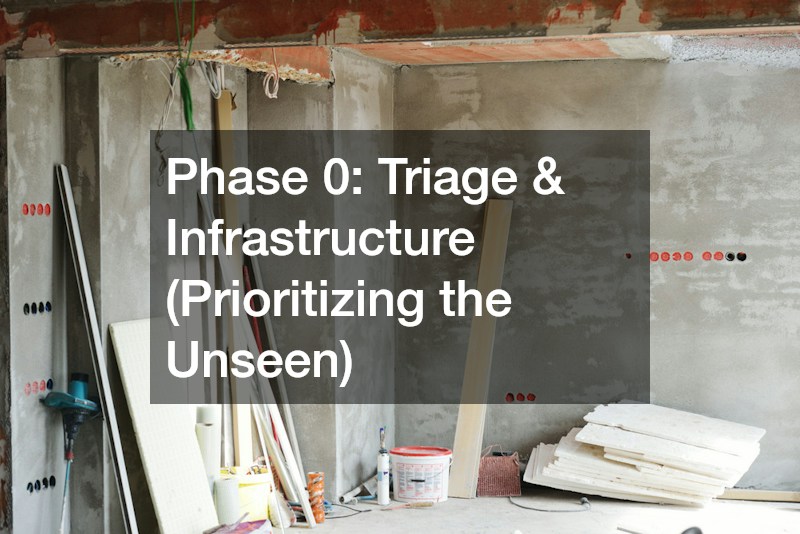
Before selecting cabinet finishes or ordering hardwood flooring, you must verify that your home’s exterior shell is completely weather-tight and structurally sound. Investing thousands of dollars in high-end interior finishes is a major financial risk if an unaddressed exterior failure allows water to seep through walls or causes floorjoists to shift. Your initial step must always involve a comprehensive inspection of the roof, exterior envelope, drainage systems, and structural framing.
When evaluating your property’s foundation, look for vertical or diagonal step-cracking in exterior masonry, sticky doors or windows that refuse to frame correctly, or uneven floorboards inside. If any of these red flags appear, pause all interior design plans immediately. Hiring qualified specialists to perform structural foundation repairs ensures that your home’s weight is properly distributed and stabilized. Addressing these structural issues early prevents expensive drywall cracking, tile fracture, and cabinet misalignment down the road.
Water is the single most destructive force in a residential structure. Damp environments foster wood-rotting fungi, degrade insulation, ruin drywall, and encourage mold growth that damages indoor air quality. Before framing new interior walls or pouring floor underlayment, inspect your lowest level thoroughly.
To properly safeguard lower levels and crawlspaces against seasonal water tables and heavy rain run-off, focus on these fundamental steps:
-
Grading and Gutters: Ensure exterior soil slopes away from your foundation wall at a minimum drop of six inches over the first ten feet. Clear gutters and position downspout extensions at least five feet away from the perimeter.
-
Sub-Slab and Wall Seals: For below-grade spaces subject to hydrostatic pressure, hire licensed basement waterproofing contractors to install interior perimeter drains, sump pumps, and interior wall vapor barriers.
-
Masonry and Hearth Inspection: Chimneys create major vertical breaches in your roofline and home envelope. Water leaking around compromised flashing can rot roof framing and ruin interior drywall. Bring in certified technicians to complete local chimney repairs, re-point damaged mortar joints, and install a dedicated stainless steel flue cap before work begins on adjacent living areas.
Phase 1: High-ROI Rooms – The Kitchen & Core Living Areas
Once your infrastructure is sealed and stable, shift your focus to the interior room that generates the highest return on investment and daily functional value: the kitchen. Because kitchens rely heavily on mechanical, electrical, and plumbing systems, they demand exact planning.
Start by analyzing your kitchen’s core workflow. The primary work triangle—the spatial relationship between your refrigerator, primary prep sink, and cooktop—should remain unobstructed by islands, peninsulas, or high-traffic pathways.
When specifying materials, balance your budget between fixed structural elements and decorative surfaces:
-
Cabinetry: Prioritize plywood box construction with solid wood face frames and soft-close hardware over particleboard options. Semi-custom cabinets often offer the best balance of quality, modification flexibility, and value.
-
Countertops: Surface selection impacts both durability and kitchen aesthetics. Reach out to regional suppliers and local countertop services to compare lead times, maintenance requirements, and fabrication costs across quartz, marble, and engineered solid surfaces.
-
Natural Stone: If you want a heat-resistant surface that stands up to heavy daily kitchen use, traditional granite counters remain an excellent option. They offer high stain resistance when properly sealed and maintain steady resale value.
-
Lighting Layers: Plan three distinct lighting circuits during framing: ambient ceiling downlights, task-focused under-cabinet LED strips, and decorative focal pendants over islands or dining nooks.
The most efficient kitchen projects follow a strict order of operations during construction. Tearing out walls or removing old cabinetry reveals hidden wall cavities, which gives your trade partners direct access to install essential utilities.
Rough-ins for electrical circuits, plumbing lines, and HVAC ductwork must occur before hanging drywall. Running high-wattage dedicated lines for induction cooktops, built-in microwaves, and dishwashers now avoids costly wall patching later. Once the walls are closed, taped, and primed, install your floor underlayment and base cabinetry. Countertop measurements are taken only after base cabinets are completely plumb, level, and secured to wall studs.
Phase 2: Bathrooms & Private Spaces
Bathrooms deliver tremendous daily convenience and strong resale value per square foot, but their dense assembly of plumbing lines makes them vulnerable to water damage if installed incorrectly. Successful bath updates rely on sound surface prep and hidden waterproofing systems rather than decorative wall tiles alone.
When taking on a full bathroom renovation, carefully review these essential project milestones:
-
Subfloor Inspection: Strip away old tile, vinyl, and compromised subflooring to inspect the joists underneath. Sister any warped or rotted floor joists and install fresh, exterior-grade plywood or specialized cement backer board to create a stiff, flat base for heavy tile.
-
Waterproofing Membranes: Shower enclosures require complete vapor protection. Apply brush-on liquid waterproofing membranes or sheet membranes over cement board or specialized foam boards before setting any tile.
-
Pan Testing: Prior to setting floor tile in a custom shower, plug the drain and fill the sloped shower pan with water for 24 hours to confirm there are no leaks into lower levels.
-
Plumbing Layout Strategy: Keeping existing drain stacks and water supply lines in their original locations saves thousands of dollars in plumbing labor. Only move wall studs or trench concrete slabs if the current room layout is unworkable.
Space-Saving Fixtures and High-Efficiency Upgrades

Because bathrooms feature tight footprints, layout efficiency is critical. Focus on smart fixture selection and moisture control to ensure the space remains comfortable and easy to maintain over time.
-
Floating Vanities: Mounting vanities to wall framing leaves floor space visible underneath, making small bath layouts feel open and spacious while simplifying floor cleaning.
-
Recessed Storage: Utilize open wall cavities by framing recessed medicine cabinets, toilet-paper holders, and shower niches directly between wall studs to maximize storage without crowding walkways.
-
Ventilation Sizing: Undersized bath fans cause condensation buildup, peeling paint, and mold growth. Install an ultra-quiet bath fan rated for at least one CFM (cubic feet per minute) per square foot of bathroom area, and vent it through your roof or exterior sidewall rather than into your attic.
Phase 3: Secondary Living Areas & Storage
With your high-investment spaces (kitchens, bathrooms, and structural systems) wrapped up, turn your attention to bedrooms, home offices, and formal living areas. These spaces generally require less utility work, making them faster and less expensive to update.
-
Architectural Trim Work: Elevate plain drywall by adding custom board-and-batten, picture frame molding, or simple wainscoting. These details add rich texture and character at a fraction of the cost of full structural changes.
-
Acoustic Insulation: If you are opening walls to upgrade electrical outlets, fill interior wall cavities with dense mineral wool insulation. This simple step dampens sound transfer between bedrooms, TV rooms, and home offices.
-
Flooring Continuity: Run consistent flooring materials—such as engineered hardwood or luxury vinyl plank—through hallways and into bedrooms. Eliminating threshold strips creates visual continuity, making your floorplan feel larger.
Convert Underutilized Square Footage
Finding extra functional area within your existing home footprint is much cheaper than building a structural room addition. Look for underused space in wide hallways, deep closets, or under stairs, and convert it into dedicated functional zones.
-
Pocket Workstations: Transform an oversized bedroom closet into a built-in pocket desk. Remove the standard doors, install a solid wood desktop surface, add vertical floating shelving above, and pull dedicated power and network cables into the cavity.
-
Modular Storage Assemblies: Swap basic hanging rods for adjustable modular closet systems. Organizing vertical hanging space, shoe racks, and built-in drawers doubles your functional storage capacity without taking up extra floor space.
Phase 4: Outdoor Living & Exterior Curb Appeal

Once your interior living spaces are complete, extend your home’s usable floorplan into the backyard. Thoughtfully designed outdoor living areas function as open-air rooms during fair weather, boosting your quality of life while adding valuable outdoor entertaining space.
When planning outdoor entertaining structures, focus on building durable outdoor gathering areas that complement your home’s architectural lines:
-
Deck Design and Material Selection: Connect indoor living areas to your yard using sliding or bifold glass patio doors that step out onto a well-proportioned outdoor deck. Consult experienced deck builders to explore structural framing options, local code requirements, and the long-term trade-offs between natural hardwoods and low-maintenance composite deck boards.
-
Pool and Water Feature Integration: If your backyard budget includes major recreational additions, hire licensed pool companies early in your design phase. Specialized pool contractors need to assess property setbacks, underground utility corridors, grade changes, and soil load capacities before bringing heavy excavation equipment onto your site.
Preserve Driveways and Exterior Footpaths
Heavy construction work takes a toll on exterior access routes. Delivery trucks, concrete mixers, and dumpster drop-offs can easily crack, displace, or wear down driveways, walkways, and patio hardscapes.
Plan to restore and maintain your property’s exterior surfaces once heavy construction equipment leaves the site:
-
Edge Stabilization and Masonry Repair: Inspect concrete paver walks and stone steps for settling or shifting. Re-set loose stones on a compacted gravel and sand base, and sweep polymeric sand into the joints to lock them in place and suppress weeds.
-
Asphalt Maintenance and Surface Protection: Heavy equipment flexes driveway surfaces, which opens up surface hairline cracks. Fill visible asphalt cracks with hot-pour rubberized filler, then apply commercial-grade driveway sealers to protect against water penetration, gas leaks, and seasonal freeze-thaw damage.
Mastering the Master Budget: Cost Controls & Contingencies
A full-home update requires active, ongoing financial oversight. Without a clear system to track real-time expenses, minor upgrades across multiple rooms can quietly push your project over budget. Manage your project using a detailed line-item budget tracking tool to catch cost overruns before they compound.
To maintain control over your finances throughout large-scale home remodeling efforts, establish disciplined budgeting practices from day one:
-
Itemize Every Scope: Break down your master budget into distinct line items covering materials, labor, demolition, waste disposal fees, permit costs, and delivery charges. Avoid relying on broad lump-sum estimate figures.
-
Maintain a Mandatory Contingency Reserve: Set aside 15% to 20% of your total project budget into an untouchable contingency fund. Older homes often conceal hidden surprises—such as outdated knob-and-tube wiring, plumbing leaks, or rotted subfloors—that you can only see once you open up existing walls.
-
Track Quotes vs. Actuals Daily: Update your spreadsheet as soon as purchase orders are generated or subcontractor invoices arrive. Tracking variances in real time allows you to offset an overage in one room by selecting more modest finishes in another.
Manage Scope Creep and Contractor Relationships
The most common cause of budget overruns isn’t contractor price increases—it’s mid-project design changes requested by the homeowner. Changing layout choices or upgrade specifications after work begins creates a compounding ripple effect of extra costs, material re-stocking fees, and scheduling delays.
Control your scope and protect your working relationships with these proven management strategies:
-
Require Written Change Orders: Never agree to verbal contract adjustments on site. Require your trade partners to provide a written Change Order detailing the exact cost change and schedule impact before authorizing any deviation from your original contract scope.
-
Finalize Selections Before Construction: Select and order all long-lead materials—including light fixtures, tile, appliances, and plumbing hardware—before demolition starts. Having materials on site prevents costly job site delays for idle trade crews.
-
Divide DIY and Professional Tasks: Be realistic about your skill set and time constraints. Save money by taking on manageable DIY tasks like demolition, simple painting, and final job-site cleanup. Leave structural changes, gas connections, panel upgrades, and complex tile work to licensed, insured trade professionals.
Renovating a home does not have to be an unpredictable, stressful ordeal. By organizing your updates into a clear, phased sequence—protecting your structural foundation first, moving to high-ROI interior spaces, refining secondary living areas, and finishing with your outdoor footprint—you prevent costly rework and keep your project moving forward smoothly.
Executing a successful home overhaul comes down to thorough preparation, disciplined budget tracking, and choosing the right trade partners for complex work. Set clear financial boundaries, maintain a dedicated contingency fund for unexpected surprises, and stick to your plan. With a structured roadmap in hand, you can confidently transform your living space into a functional, comfortable home that serves your family well for years to come.