
When it comes to improving our living spaces, popular media and television shows have conditioned us to believe that transformation requires total demolition. We are shown dramatic sequences of sledgehammers swinging through drywall, families moving into temporary rental properties for six months, and budgets that rival the cost of a luxury vehicle. This pervasive narrative creates a significant barrier to entry for the average homeowner, leading many to postpone improvements indefinitely because a massive overhaul simply is not feasible. However, the reality of home design is far more forgiving and much more nuanced.
The most deeply satisfying and impactful upgrades are often the smaller, strategic changes that target daily friction points or elevate the visual appeal of highly trafficked areas. Transforming a home is less about tearing down structural walls and more about understanding how aesthetics, lighting, and spatial flow influence your daily mood. By focusing your attention and your budget on specific, manageable tweaks, you can achieve a profound impact on your home’s overall look and feel without enduring the chaos of a full-scale remodel.
Paint, Reface, or Swap Hardware for an Instant Kitchen Facelift
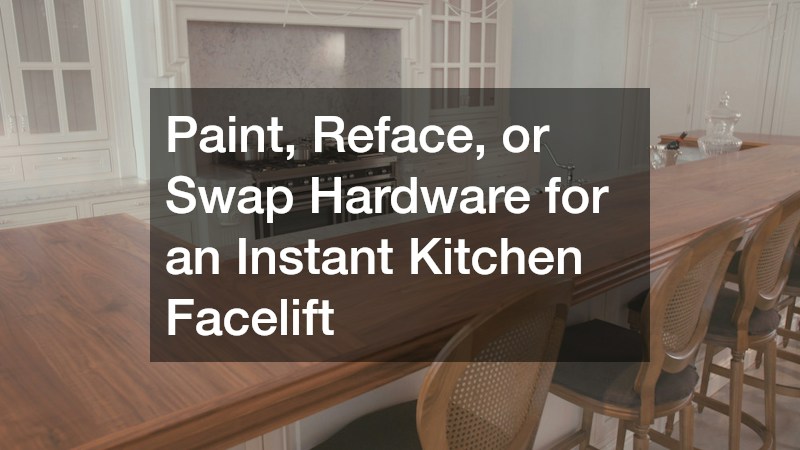
The kitchen is universally acknowledged as the heart of the home, which means it also suffers the most visual scrutiny. If your layout is already functional and your cabinet boxes are structurally sound, tearing them out is an unnecessary waste of resources. Instead, evaluate the current state of your cabinetry. If the wood is in good condition but the finish feels dated, painting them can completely modernize the room. Transitioning from heavily grained, early-2000s oak to a sophisticated matte sage, deep navy, or warm taupe creates an entirely new atmosphere. The key to a durable painted finish lies in the preparation: thorough degreasing, light sanding, applying a high-adhesion stain-blocking primer, and finishing with a self-leveling cabinet enamel.
If you prefer the look of natural wood or want a different door style, refacing is your next best option. You can keep your existing layout but order brand-new, custom-sized doors and drawer fronts. By sourcing these directly from specialized cabinet companies, you can save a tremendous amount of money compared to a full demolition and replacement.
Beyond the cabinet surfaces, hardware acts as the jewelry of the kitchen. Swapping out standard, builder-grade knobs for modern alternatives can shift the entire design paradigm.
- Scale up your hardware: Replace tiny knobs with oversized, elongated pulls in finishes like brushed brass, matte black, or polished nickel. A general rule of thumb is that the pull should be about one-third the length of the drawer.
- Optimize interior flow: Visual upgrades are wonderful, but functional upgrades change how you experience the space. Install pull-out trash and recycling centers to hide freestanding bins.
- Maximize drawer utility: Add deep wooden drawer dividers for pots and pans, or insert tiered spice organizers to free up upper cabinet space.
If you are struggling to make your existing footprint work for your cooking habits, consulting with professional kitchen designers for just an hour or two can provide incredibly clever organizational solutions or layout optimizations that you can implement yourself without picking up a sledgehammer.
Layer Ambient and Task Lighting While Refreshing High-Traffic Surfaces

Lighting is arguably the most critical yet frequently overlooked element in home design. A beautifully styled room will still feel cold and uninviting if it is illuminated by harsh, single-source overhead lighting. The secret to a high-end atmosphere is layering your light sources. A well-designed space utilizes the rule of three: ambient lighting for overall illumination, task lighting for specific functions, and accent lighting for mood and depth.
In a kitchen or prep area, task lighting is paramount. Installing LED strip lighting directly under your upper cabinets eliminates shadows cast by your body when you are chopping vegetables or reading recipes on the counter. Over an island or peninsula, hanging a pair of statement pendant lights provides both necessary task lighting and a strong visual anchor that grounds the room.
When dealing with hardwired fixtures, especially in older homes where wiring may be unpredictable or out of code, it is always safest to hire a licensed residential electrician. They can ensure your new pendants are safely installed, properly centered, and equipped with the correct load-bearing junction boxes. They can also upgrade your standard on-and-off switches to smart dimmers, allowing you to instantly shift an open-concept space from a bright, energetic prep zone into a dim, moody dining atmosphere.
Surfaces are another area where small changes yield massive visual rewards. If you have an island or a powder room vanity that feels lackluster, you do not need to purchase a massive, expensive slab of quartz or marble.
- Shop the remnant yard: Visit local stone fabricators and ask to look at their off-cuts or remnants. These are leftover pieces from larger projects that are sold at a steep discount.
- Utilize professional installation: Once you find a remnant piece you love, utilize local countertop services to template, cut, polish, and install it. This provides a luxury focal point in just a few hours without displacing your family.
- Consider butcher block: For a warm, organic texture, thick walnut or maple butcher block can be cut to size and sealed with mineral oil, offering a high-end look for a fraction of the cost of stone.
Swap Out Fixtures and Control Natural Light for Instant Serenity
Bathrooms are fundamentally utilitarian spaces, but with a few intentional adjustments, they can easily mimic the atmosphere of a luxury spa. One of the most common signs of a builder-grade bathroom is the massive, unframed plate-glass mirror glued directly to the drywall above the sink. Removing this mirror and replacing it with something more intentional immediately upgrades the room. You can choose a pair of heavily framed mirrors in warm wood tones to add texture, or install a sleek, backlit LED vanity mirror. Backlit mirrors provide incredibly flattering, shadow-free illumination for morning routines and serve as a beautiful, glowing nightlight in the evenings.
The fixtures in your shower also play a disproportionate role in your daily comfort. Swapping out a standard, low-pressure showerhead is a project that takes less than fifteen minutes and requires nothing more than an adjustable wrench and some thread seal tape.
- Upgrade to a rainfall experience: Installing a wide, overhead rainfall showerhead creates a luxurious, drenching experience. If your plumbing is too low, you can purchase an S-shaped extension arm to raise the height of the showerhead by several inches.
- Add a dual-wand system: Incorporating a handheld wand makes cleaning the shower significantly easier and provides a more versatile bathing experience.
- Upgrade the enclosure: If you want to replace a dark, heavy shower curtain with a sleek, seamless glass enclosure, reaching out to a local bathroom remodeling company is your best course of action, as they can measure and install heavy tempered glass safely in a single afternoon.
Equally important to the fixtures is how you handle natural light and privacy. Bathrooms require a delicate balance: you want as much natural sunlight as possible to make the space feel airy, but you cannot compromise on privacy. Standard aluminum mini-blinds often warp, rust, or accumulate heavy dust in high-humidity environments. To elevate the space, consult with professional blind services to custom-measure and install moisture-resistant treatments. Top-down, bottom-up cellular shades are an excellent choice for bathrooms; they allow you to pull the shade down from the top to let the sunlight stream in, while keeping the bottom half completely opaque for total privacy.
Declutter Vertically and Seal the Floor for a Clean, Multi-Use Zone

Utility spaces, such as basements, mudrooms, and garages, are frequently neglected in the design process. Because they are not typically seen by guests, they quickly devolve into dumping grounds for seasonal decor, unused sports equipment, and bulk household supplies. However, reclaiming these utilitarian areas can drastically improve your lifestyle and make your entire home function more smoothly.
The most effective strategy for these zones is vertical decluttering. When items pile up on the floor, the room feels chaotic, restrictive, and impossible to keep clean.
- Install heavy-duty wall tracks: Mount heavy-duty steel track systems horizontally across the wall studs. This allows you to snap on various hooks, baskets, and shelving brackets to hang bicycles, ladders, and yard tools securely off the ground.
- Utilize overhead space: The ceiling is the most underutilized storage real estate in any home. Mount overhead steel racks securely into the ceiling joists above the garage door tracks. This is the perfect location for bulky, lightweight items like holiday decorations or camping gear that you only need to access once or twice a year.
- Categorize and contain: Transfer items from deteriorating cardboard boxes into uniform, clear plastic bins with tight-fitting lids, and label them clearly. This uniform look instantly calms the visual noise of a storage area.
Once the clutter is elevated, the next crucial step is addressing the floor. Raw concrete floors constantly shed a fine, chalky dust that inevitably gets tracked into your main living areas. If you decide to pursue a dedicated garage renovation to turn the space into a usable home gym, workshop, or recreation spot, sealing the floor is non-negotiable. Standard DIY floor paints often peel and flake away under the heat of car tires. To achieve a truly durable, showroom-quality surface that resists oil stains and can be easily mopped clean, it is highly recommended to hire an experienced epoxy flooring company. These professionals use heavy diamond grinders to open the pores of the concrete, ensuring the commercial-grade epoxy resin bonds permanently to the slab, resulting in a flawless, glassy finish that completely changes how the space feels.
Update Underfoot Textures and Finish Lower-Level Flex Spaces

The flooring throughout your main living areas serves as the visual foundation of your home. One of the most common issues in older or heavily compartmentalized homes is the presence of disjointed flooring. You might find original hardwood in the living room, dated ceramic tile in the kitchen, and carpet in the hallway. This patchwork effect visually chops up the floorplan, making the house feel much smaller and more chaotic than it actually is.
Creating a sense of expansive, grounding flow requires unifying the floors. Running a single, continuous flooring material throughout the entire main level draws the eye seamlessly from one room to the next, expanding the perceived square footage.
- Choose durable materials: Luxury Vinyl Plank has become an incredibly popular choice because it perfectly mimics the look of natural wood while offering complete waterproof durability and superior scratch resistance, making it ideal for high-traffic areas and homes with pets.
- Prep the subfloor: The longevity of any new floor depends entirely on what lies beneath it. Bringing in expert flooring services ensures that uneven subfloors are properly leveled with self-leveling compounds before installation, preventing the new planks from bouncing, squeaking, or unlocking over time.
- Eliminate transitions: A continuous floor means removing bulky T-moldings and threshold transition strips in doorways, creating a sleek, unbroken surface that is visually calming and easier to clean.
Beyond the main level, the lowest level of your home offers the greatest potential for expanding your usable living space. A full-scale lower-level build-out can be a massive financial undertaking, but you do not need to finish the entire footprint all at once to reap the benefits. A phased approach to a basement renovation allows you to tackle the space strategically, focusing on one habitable “zone” at a time. You can start by addressing the ceiling. Traditional drop ceilings can feel claustrophobic and dated. A popular, budget-friendly alternative is the industrial loft look: thoroughly cleaning the exposed floor joists, ductwork, and plumbing, and then spraying everything in a single, unifying color, such as flat black or crisp white. This instantly draws the eye upward, making the ceiling feel significantly taller while saving thousands of dollars on framing and drywall. From there, you can choose to frame and finish just one single corner of the lower level. By adding some insulation, drywall, and a comfortable area rug to a ten-by-ten section, you instantly create a quiet, dedicated home office, a secluded workout studio, or a cozy media room, adding immense lifestyle value without breaking the bank.
Creating the home of your dreams does not mandate starting from scratch or enduring months of chaotic construction. The way a home feels is deeply influenced by the details you interact with every single day. Upgrading the hardware you touch, the lighting that sets your mood, the surfaces you prep your food on, and the organizational systems that hold your belongings can completely revitalize a living space.
When planning your improvements, focus your budget and your energy on the rooms you inhabit most frequently to maximize your daily return on enjoyment. A beautiful, functional home is built through a series of thoughtful, incremental choices rather than one overwhelming overhaul. Take a look around your own space, pick just one actionable concept from this guide—whether it is swapping out a builder-grade mirror, painting your kitchen island a bold new color, or finally getting your garage clutter off the floor—and start transforming your home this weekend.
